

Easy Sauerkraut from your Winter Garden
/If you haven’t tried it before, sauerkraut is one of the easiest and most delicious things you can make from your Winter garden harvests. It’s a great way to use extra greens from Brassica plants (cabbage, broccoli, cauliflower, collards, kale, etc.), it’s incredibly healthy, and is a great way to store nutrients for months to come. There are an endless number of recipes and methods for making sauerkraut, but the one below is simple, tried, and true!
Traditionally, shredded cabbage leaves are used to make sauerkraut, but any leaves from related plants are hardy enough to make it through the pressing and fermenting stages. As you prune off broccoli or cauliflower leaves that are shading other plants, or are resting on the soil and haven’t become moldy or discolored, bundle them up for the fridge and plan to save them for kraut making. Even if the leaves don’t need pruning for other reasons, cutting 2 or 3 per plant on occasion won’t decrease a plant’s productivity!
Once you have a nice, large batch of leaves (you can ferment with any amount, you just need an appropriately-sized vessel to fill to the top), remove the stems and thick mid-veins down the center of the leaves, and cut the remaining leafy matter into thin strips. Put all strips into a large bowl and sprinkle them with salt. The amount of salt you add is entirely dependent on taste; some people add no salt at all, while others use a heavy dousing. Salt helps to wick the water from the leaves, which then becomes the fermenting brine, and it has an antibacterial effect, although it’s perfectly safe to ferment without it. Flavor is its main contribution. For beginners, try a generous shaking across the top.
Once your strips are salted, use your hands, a pestle, or a heavy kitchen tool like a tenderizer, and begin pressing the leaves into the bowl. Hands tend to work best, although salt can sting your skin, in which case you may prefer to use rinsed latex gloves. Press and squeeze handfuls, make a fist and grind into the bottom of the bowl with your knuckles, do what you can to squeeze as much moisture out of the leaf strips as possible. Keep at it and soon you will notice water rising in the base of the bowl. Once this moisture begins to rise up high enough to be even with the level of your strips, you’ll have enough moisture for fermenting. Fermentation happens as anaerobic bacteria proliferates in the air-free brine and breaks the leaf cells down very slowly, allowing it to stay edible for a long period of time.
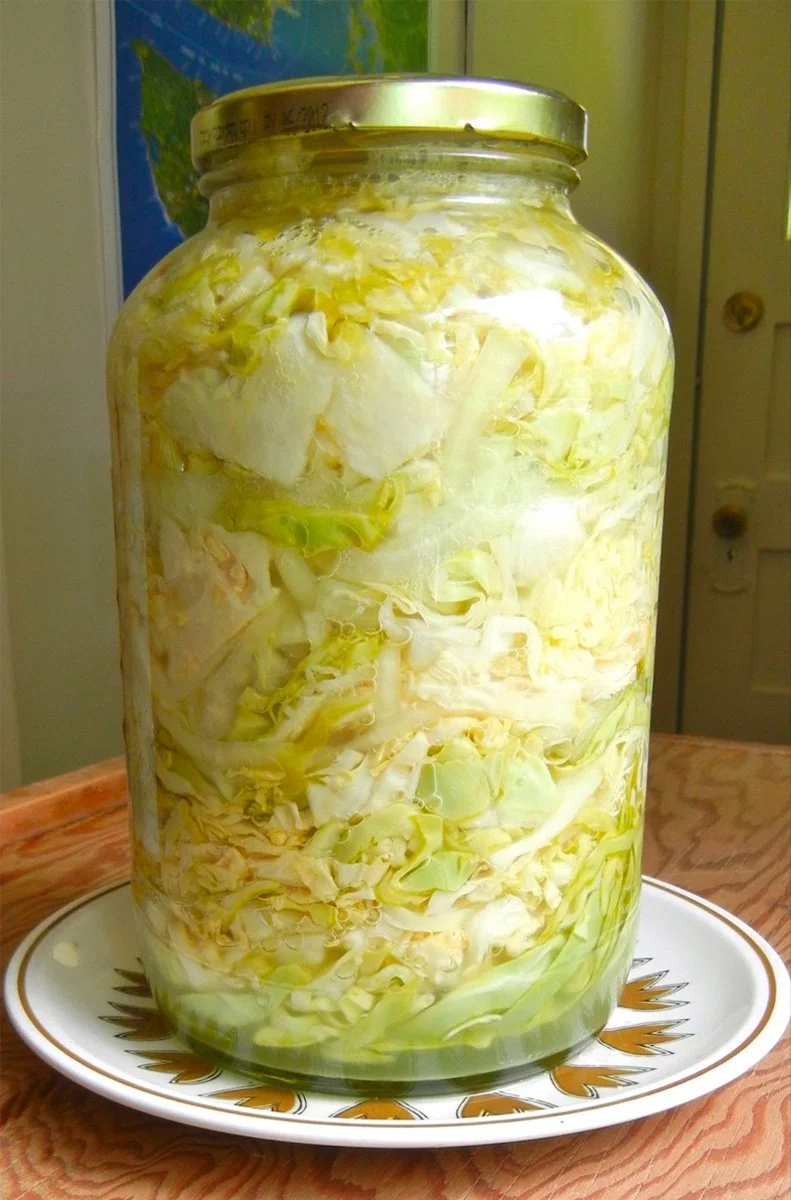
The final step is cramming it all into a container that you can put a loose lid on. A ceramic crock pot, one or more jars of appropriate size, a glass Tupperware: there are many options, although stay away from plastic. And make sure the container is clean before filling! As you fill with leaf strips, pack them down to eliminate any air bubbles or pockets, and add the watery brine from the bowl as you go. Ideally, your container will be filled close to the brim and will be packed tightly with leaves so all are totally submerged in liquid.
To keep the leaves beneath the water level, use a rolled up discarded leaf section, a clean stone, an upside down smaller lid or plate, or any clean object that you can fit between the leaves and the container lid, which you will lightly apply. If it’s threaded, screw it on enough for it to stay, but not so tight that liquid can’t escape. As the fermenting bacteria breathes and releases gas, the liquid will expand and overflow the container, which is normal. For this, it is helpful to set your fermenting container on a towel or paper towels, and will need to be changed out occasionally as it gets wet.
Fermentation will begin immediately, and will increase in speed the warmer it gets, so it’s best to store the container in a moderate to cool, dark cabinet or drawer. A kitchen cabinet usually provides a fine balance of light and regulated temperature. Once the fermentation action revs up, as evidenced by the fluid overflowing, give it a taste to see how it is. Keep it in the cool, dark space day after day until the flavor is where you want it, and then transfer the container to your fridge, where fermentation will slow way down.
Your finished sauerkraut will stay good for a long while, perhaps even months, and the flavor will change over time. Give it a try, and have fun!


